Enables SMBs to Compete with Larger Enterprises")


Setting up a reliable network for your mixing station is crucial for live sound engineers, recording studios, and anyone working in audio production. Whether you’re a seasoned professional or just getting started, understanding the intricacies of a mixing station network setup can significantly enhance your workflow and audio quality. This guide will provide you with all the details to ensure your setup is robust, efficient, and tailored to your needs.
What is a Mixing Station Network Setup?
A mixing station network setup involves connecting a digital mixing console, control devices (like tablets or laptops), and other audio peripherals via a network. This allows for real-time monitoring, adjustments, and seamless integration of audio components, ensuring optimal performance during live events or studio sessions.
Why is a Network Setup Important?
- Remote Control: Modern mixing consoles can be controlled remotely via apps or software. This is invaluable during live events where the sound engineer might need to adjust settings from different locations.
- Scalability: A networked setup allows for easy addition of devices like personal monitor mixers, stage boxes, and recording interfaces.
- Flexibility: Network setups support wireless control, reducing cable clutter and enabling mobility.
- Improved Efficiency: Real-time data transmission ensures minimal latency and precise control.
Components of a Mixing Station Network Setup
To build an efficient mixing station network, you need the following components:
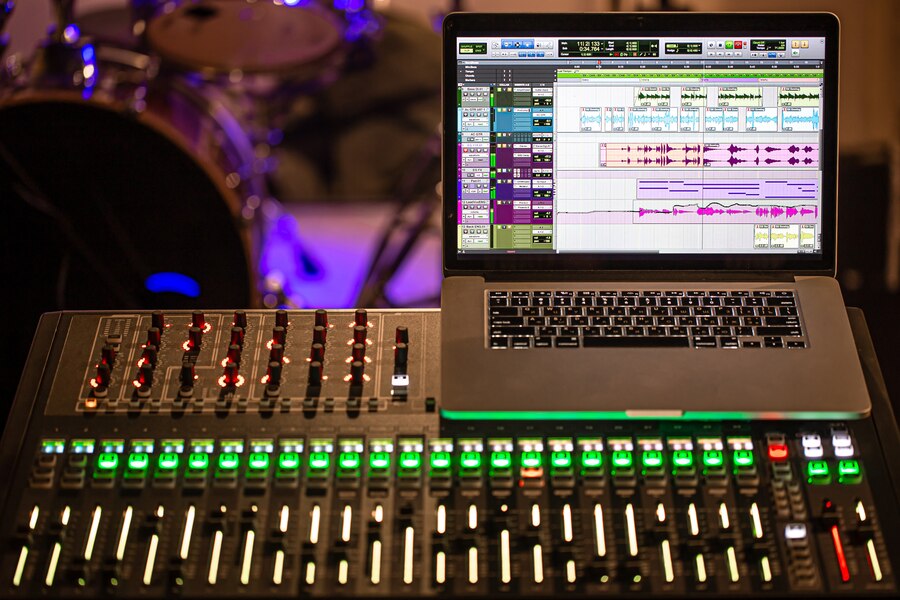
1. Digital Mixing Console
- The core of the system, this console processes audio signals and manages inputs/outputs.
- Examples: Behringer X32, Allen & Heath SQ series, Yamaha TF series.
2. Router or Network Switch
- A reliable router ensures seamless communication between devices. If you’re connecting multiple wired devices, a network switch is essential.
- Look for dual-band routers with robust signal strength and low latency.
3. Control Devices
- Tablets, smartphones, or laptops are used to control the mixing console remotely. Ensure these devices are compatible with the console’s app or software.
4. Ethernet Cables
- High-quality Cat5e or Cat6 cables are recommended for wired connections. These cables provide stable and high-speed data transmission.
5. Wi-Fi Extenders or Access Points
- In large venues, Wi-Fi extenders ensure consistent signal coverage, allowing control devices to function smoothly.
6. Audio Interfaces and Stage Boxes
- These expand input/output capabilities and integrate seamlessly with the console over the network.

Steps to Set Up a Mixing Station Network
1. Plan Your Network Layout
- Determine the number of devices to connect and their locations.
- Decide whether to use wired, wireless, or a hybrid network.
2. Configure the Router
- Assign a static IP address to the digital mixing console to prevent connection issues.
- Enable a secure Wi-Fi network for wireless devices and use strong passwords.
- Set the router to “Access Point” mode if connecting to an existing network.
3. Connect the Digital Mixing Console
- Use an Ethernet cable to connect the console to the router or network switch.
- Ensure the console’s network settings are configured to match the router’s IP range.
4. Set Up Control Devices
- Install the console’s control app or software on your tablet, smartphone, or laptop.
- Connect the device to the router’s Wi-Fi network and ensure it recognizes the mixing console.
5. Integrate Additional Devices
- Connect stage boxes and personal monitor mixers via Ethernet cables or compatible wireless systems.
- Ensure all devices are on the same IP range to facilitate communication.
6. Test the Setup
- Verify connectivity by adjusting parameters on the control device and observing real-time changes on the console.
- Check for latency, signal drops, and audio quality.
Troubleshooting Common Issues
1. Connectivity Problems
- Check if all devices are on the same subnet.
- Restart the router and reconnect devices.
2. Latency or Dropouts
- Use wired connections for critical devices.
- Ensure the router’s firmware is up to date.
3. Interference
- Avoid crowded Wi-Fi channels by using a channel scanner tool.
- Place the router away from potential interference sources like LED screens or other wireless equipment.
4. Incompatible Devices
- Update the firmware or software of all connected devices.
- Refer to the manufacturer’s compatibility guidelines.
Tips for Optimizing Your Setup
- Use VLANs: If your network is shared with other services, create a dedicated VLAN for the mixing station to prioritize audio traffic.
- Backup Configurations: Save your network and console settings to avoid reconfiguration during emergencies.
- Regular Maintenance: Periodically update firmware, clean cables, and test connections.
- Invest in Quality Equipment: Reliable routers, switches, and cables can prevent many common issues.
Conclusion
A well-structured mixing station network setup is essential for modern audio production. By understanding the components, configuration steps, and troubleshooting techniques, you can create a system that meets your specific needs. Whether you’re managing a live event or working in the studio, a robust network setup ensures seamless operation, allowing you to focus on what matters most—delivering excellent sound quality.